Running tutorials
If you had JBuilder already installed and did not follow the installation instructions, there are some settings that need to be made. Please see the last part of the Jbuilder installation tutorial for instructions on how to update your JDK, in case you do not have 1.5.x installed and how to add the MADS library.
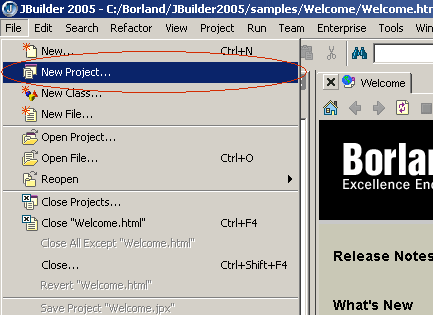
Create a new project by going to the New Project line from the File menu.
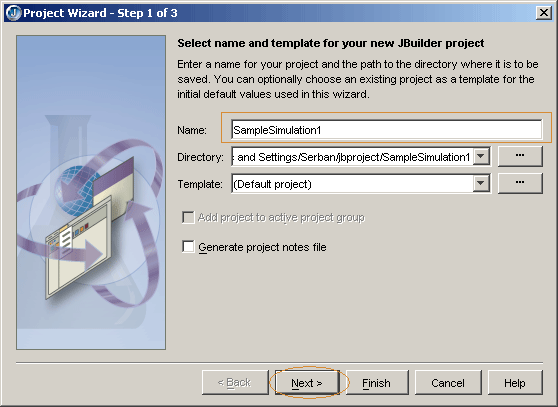
Fill the name of the project. For example, write "SampleSimulation1". Then click Next.
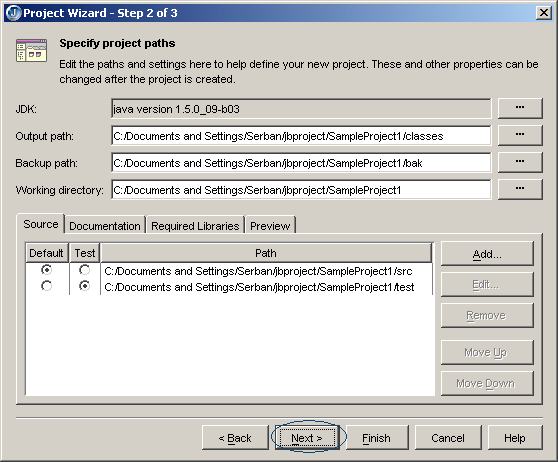
Make sure the java version is 1.5 and not 1.4. This can be seen in the gray box lababed JDK. If the JDK version is 1.4, you need to change it as shown in the JBuilder installation tutorial. If all is OK, click Next, then Finish.
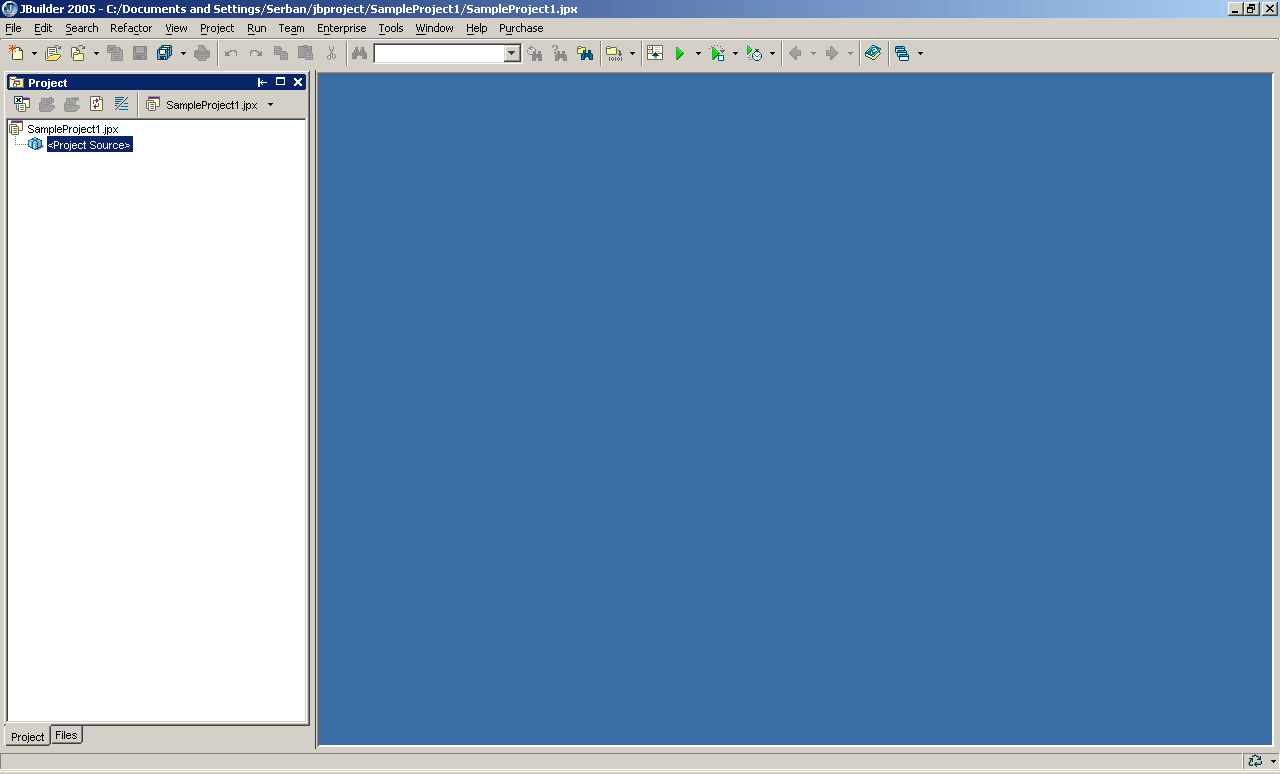
The empty new project should look like in the picture below.
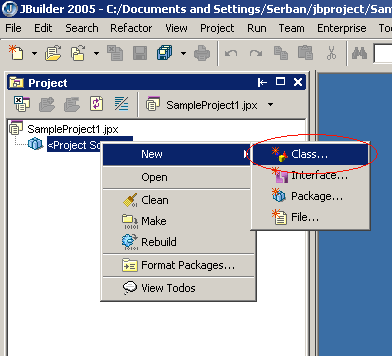
Now create a new class, where we will put the simulation. Every simulation has to be included in a class. In Java, there is no code outside classes. Right-click on the "Project Source" entry from the Project window, choose New and then Class...
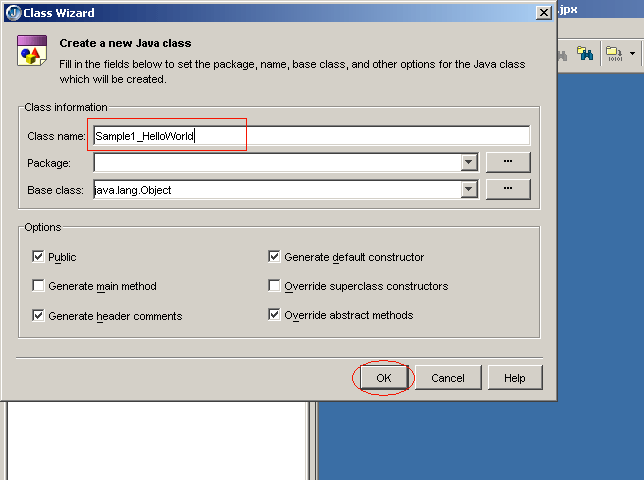
Now write a name for the new class. Remember that in Java the name of the main class and the name of the file holding it must be the same. As for this sample we will just paste the code from the Hello World tutorial, we will use the same class name as in the tutorial so that the file name will match. After writing the name, click OK.
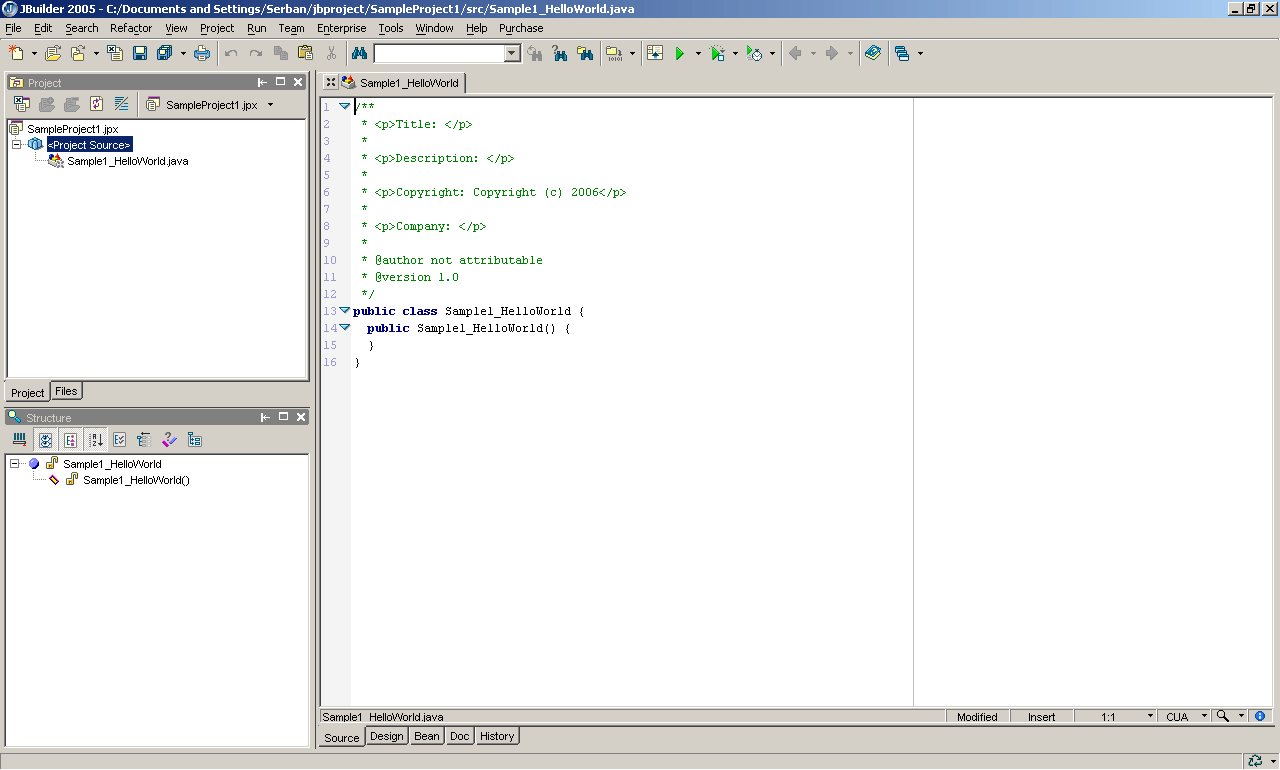
JBuilder will automatically create the files and some basic code. It should look like in the picture below.
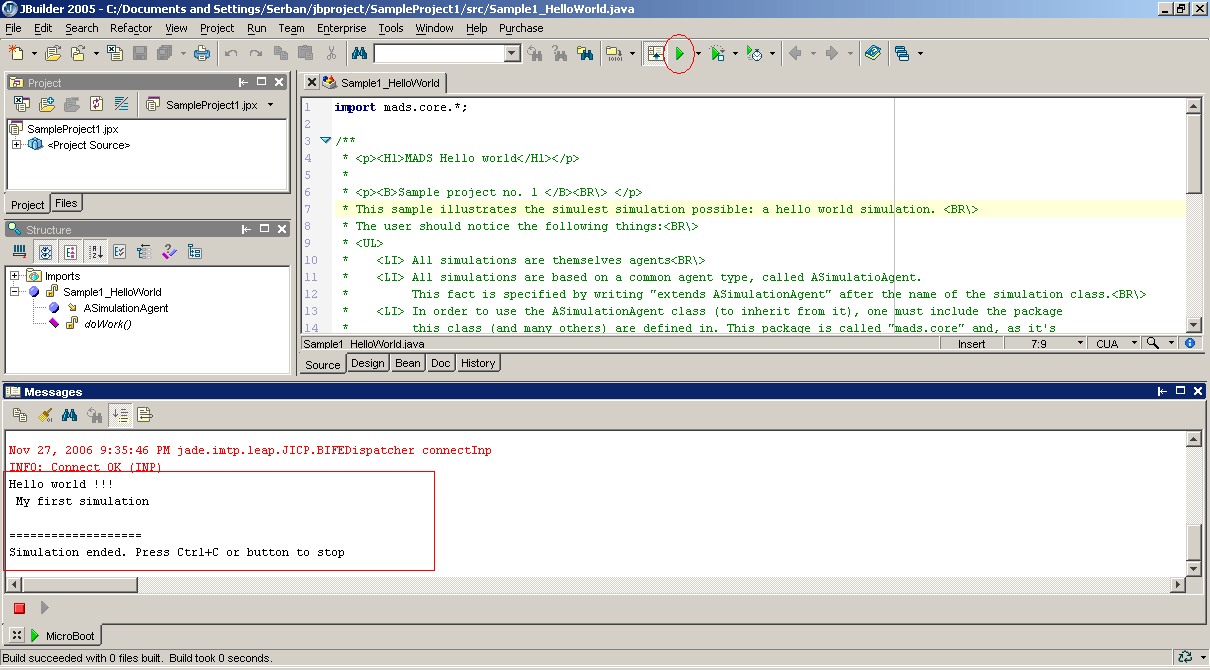
Copy the code from the Hello World tutorial, delete all the JBuilder generated code and paste. You should have something like in the picture below. Press the Run button, which looks like a green triangle.
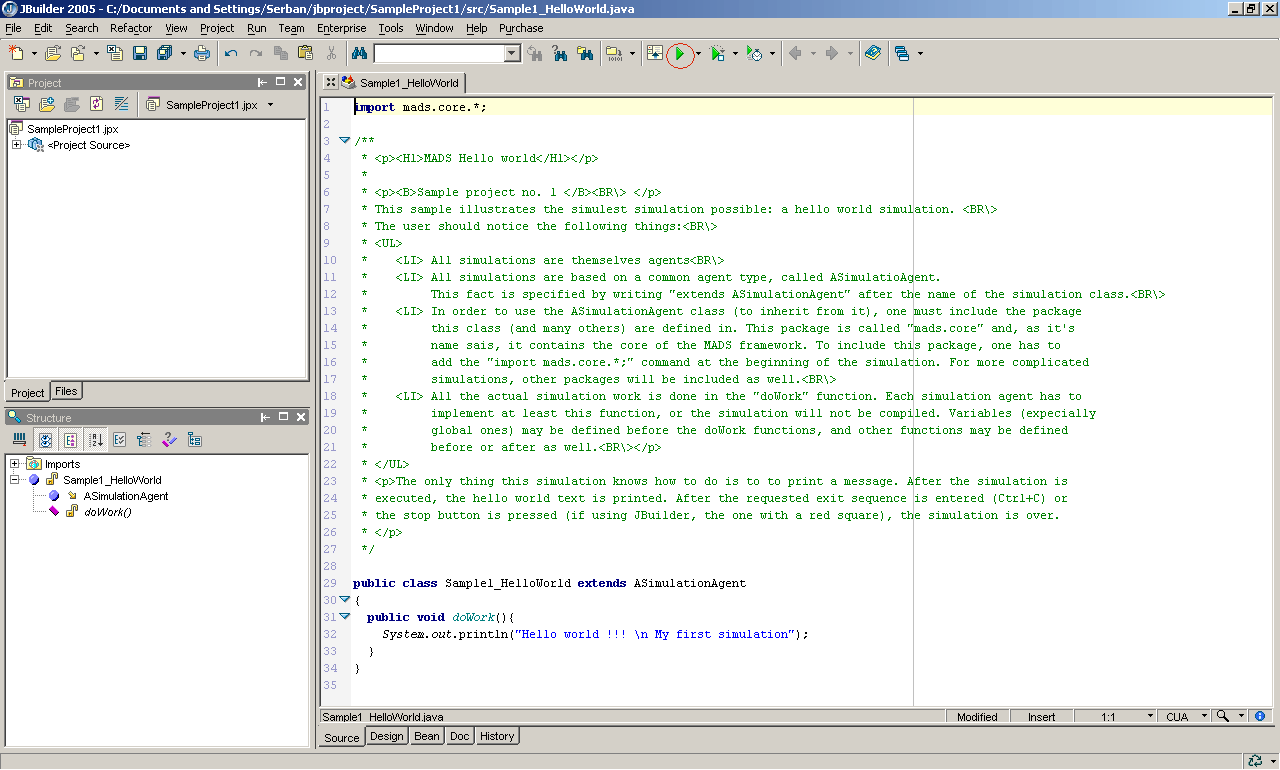
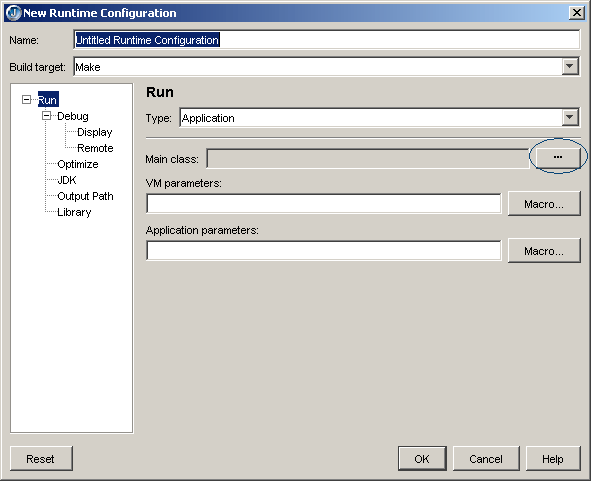
The first time the code is run, a Runtime Configuration has to be created. This will tell JBuilder which classes have to be started plus the necessary parameters. To choose the Main class, press the "..." button found in the right side of the box.
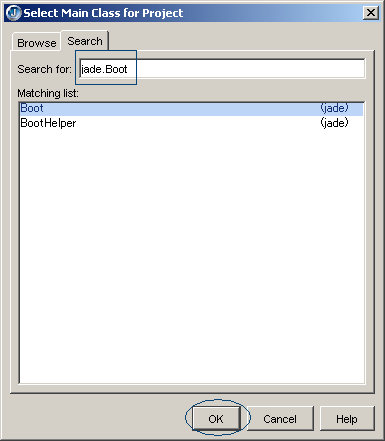
Fill the search box with "jade.Boot". As you type, JBuilder progressively narrows the list of classes matching the search criteria. In the end, just this class should be presend in the Matching List. Make sure it is selected, then press OK.
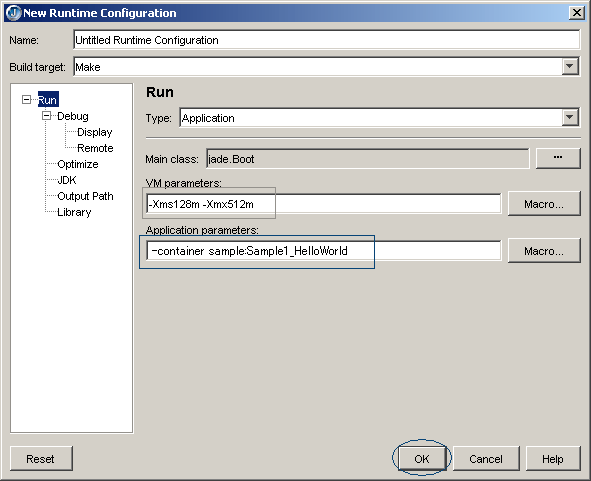
Type "-Xms128m -Xmx512m" in the VM Parameters text box. This will tell JDK to reserve 128MB of RAM for simulation, which could be increased, if necessary, to 512MB. Type this only if you have at leas 512MB of memory available. In the Application Parameters box, type "-container sample:Sample1_HelloWorld". This will instuct JADE to create a simulation agent called sample, based on the newly created Sample1_HelloWorld class. Press OK.
Press again the Run button (the green triangle). Make sure the server is running. If not, start it by clicking the Start button, going to the Programs group, from here to the SAGS Personal Web Server application group and clicking the "start server" item. The program should now run and the output should be displayed in a white box found at the bottom. After the application has ended, press the Stop button (red square) to end the simulation. To restart the simulation, press the Start button again.
